


M2S Guide: Honey B. Lovely
Part 2 of 4 · AAC Light-heavyweight (Savage)
- Difficulty
- Savage
- Level
- 100
- Item level
- 705 – 730
- Party
- 8 (2T · 2H · 4D)
- Patch added
- 7.05
Honey B. Lovely is a fight about hearts: every avoidable hit adds one, and four hearts charm you and heal the boss. Remember each stored spread or pair cast and never take a tower or stack you have no room for.
Before you pull
Strat overview, assignments, macro
JP PF Strat: Hearts planned by role in Beat 1, split support/DPS stacks in Beat 2, quadrant defamations in Beat 3 and a six-second Rotten Heart contact.
NA Party Finder often runs the 0S/1N package for Beat 2 (zero-heart players south, merged stacks) and a north Mario Kart route for the first bees. EU groups often say "Hector" but may mix variants. The PF description always wins: read it before joining.
Before joining a PF, confirm
- Partner quadrants, spread order and marker colors
- Beat 2: split stacks (JP) or 0S/1N merged stacks
- Alarm 1: north route, split group or reactive dodge, and the direction
- Beat 3: clock or quadrant defamations
- Rotten Heart: contact cue, healing and mitigation order
Unlock: Talk to Gabbro in Solution Nine after completing "The Neoteric Witch".
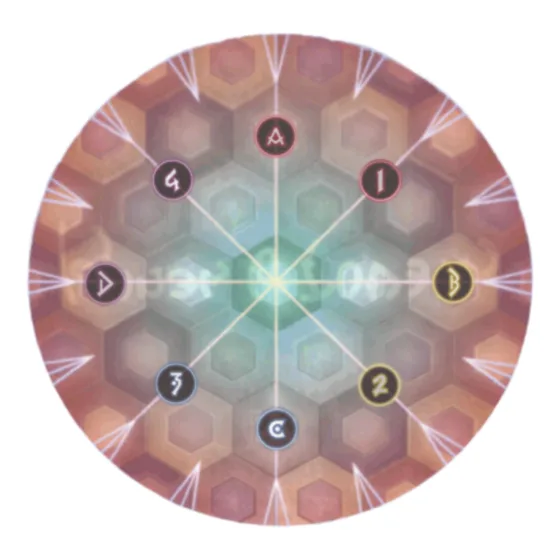
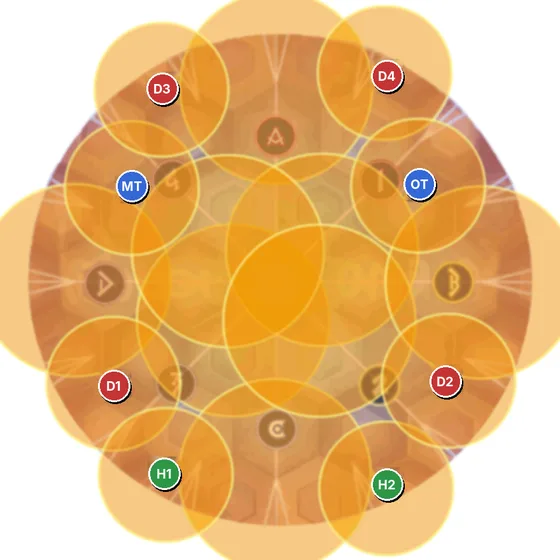
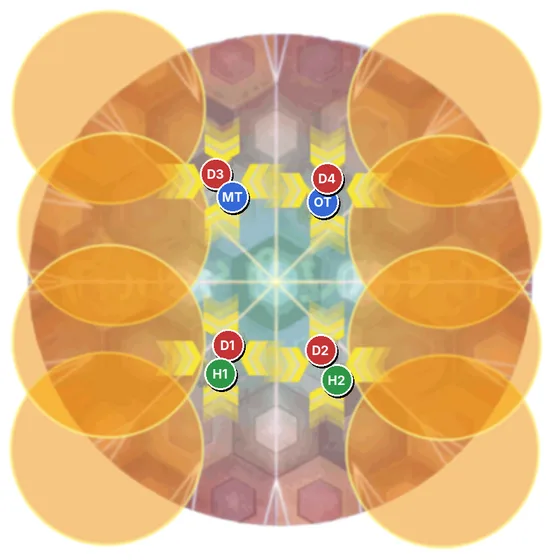
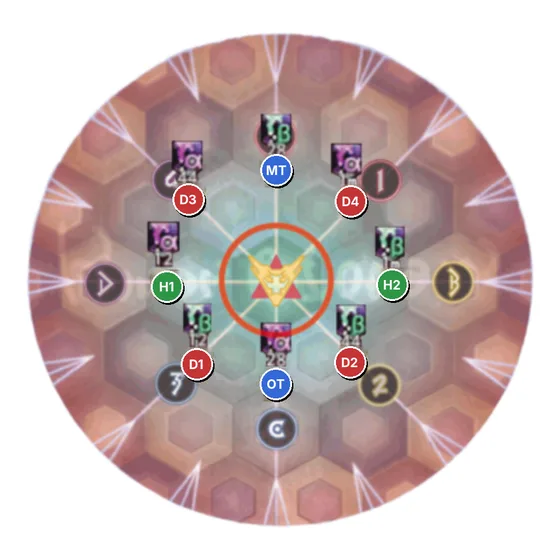
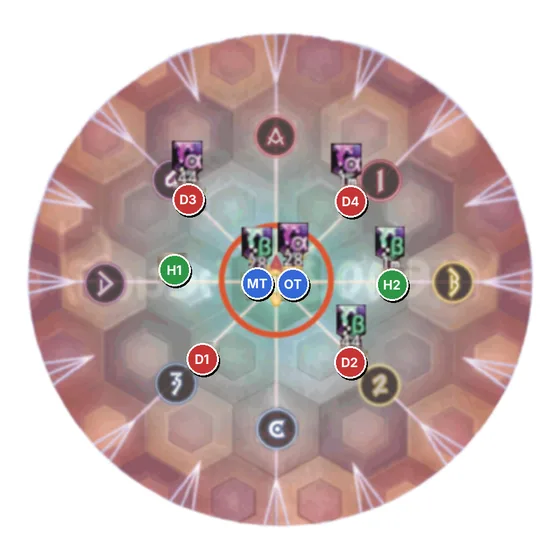
- Clock spread: N MT, NE D4, E H2, SE D2, S OT, SW D1, W H1, NW D3
- Pairs: MT+D3 northwest, OT+D4 northeast, H1+D1 southwest, H2+D2 southeast
- Line-up north to south: ranged DPS, tanks, melee DPS, healers
- Alarm Pheromones 2 groups: supports north/west, DPS south/east
- Call Me HoneyRaidwideRaidwide. Mitigate.
- Splash / Drop of VenomSpreadStores a spread (Splash) or partner stacks (Drop) for later.
- Tempting Twist / Honey BeelineFloorDonut or wide line; resolve the stored Venom in the safe area.
- Stinging SlashTankbusterCones on the top two enmity; tanks split and aim away.
- Killer StingTankbusterShared tankbuster; tanks stack with mitigation.
- Centerstage / Outerstage ComboConesThree-step dodge: cones with in/out, then a cross, then the opposite in/out.
- Alarm PheromonesConesBees charge in straight lines at players; watch the lanes.
- Poison 'n' PopSpreadLarge personal explosions on timers, then towers.
- Rotten HeartStackOpposite Beeloved Venom pairs touch to cleanse; each contact hits the party.
- Sheer Heart AttackEnrageHard enrage at roughly ten minutes.
/p M2S - JP PF Strat (all boss-relative)
/p Spread: NW D3 · N MT · NE D4 | W H1 · E H2 | SW D1 · S OT · SE D2
/p Pairs: NW MT+D3 · NE OT+D4 · SW H1+D1 · SE H2+D2
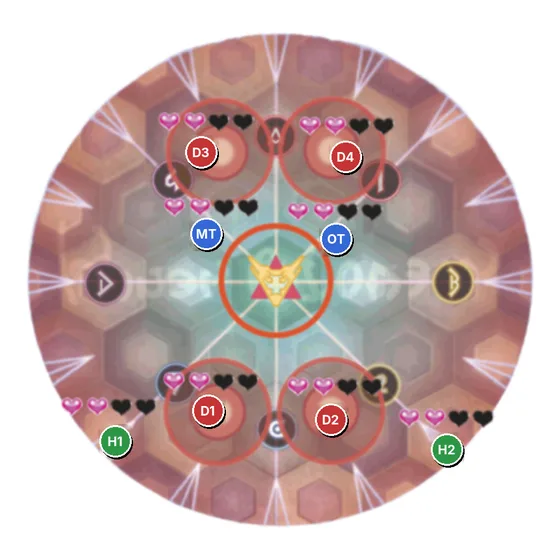
/p Beat 1: tanks/melee take 2 hearts (stack) | healers/ranged take 3
/p Beat 2, 0 hearts: center → north; supports W, DPS E (stack)
/p Beat 2, 1 heart: wait south, drop the AoE; towers supports N/W, DPS S/E
/p Poison drop: supports NW, DPS SE
/p Beat 3: drop debuffs; take towers by pair spot
/p Black Heart: 8-way spread; regroup center by pair once HP is back
Paste into a macro or Party Finder description. Confirm with your party before the pull.
Fight order
Mechanics
01Venom: remember the castSplash = spread, Drop = pairs. Resolve after the next shape.
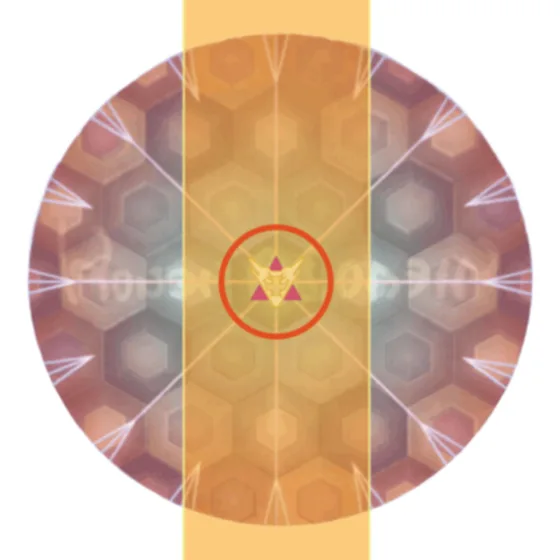
Drop of Venom means partner stacks, Splash of Venom means spread. The cast is stored until after Tempting Twist or Honey Beeline: dodge the shape first, then resolve it in your safe pocket.
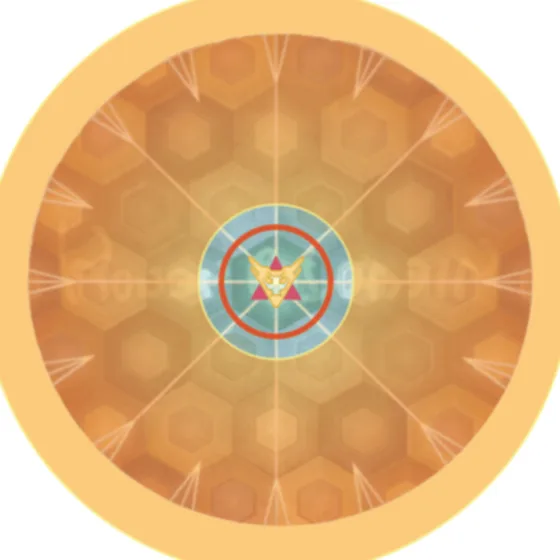
02Centerstage & Outerstage ComboThree hits, three positions. Move every hit.
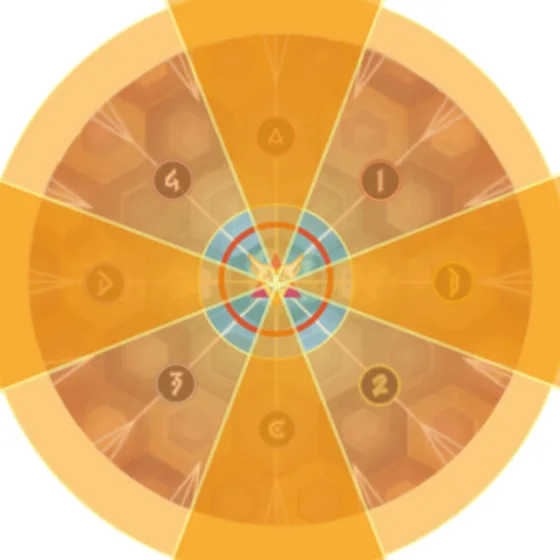
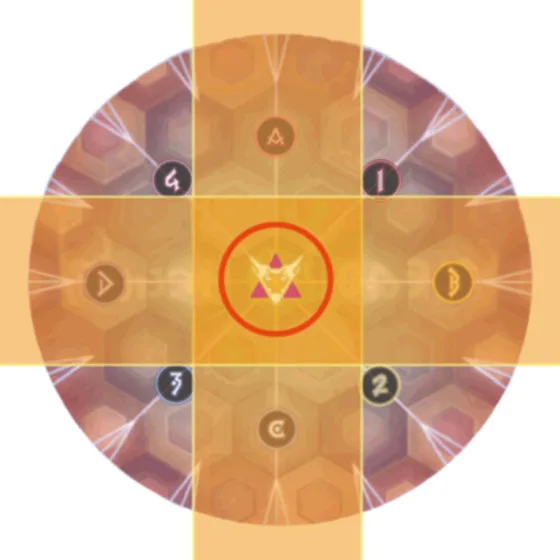
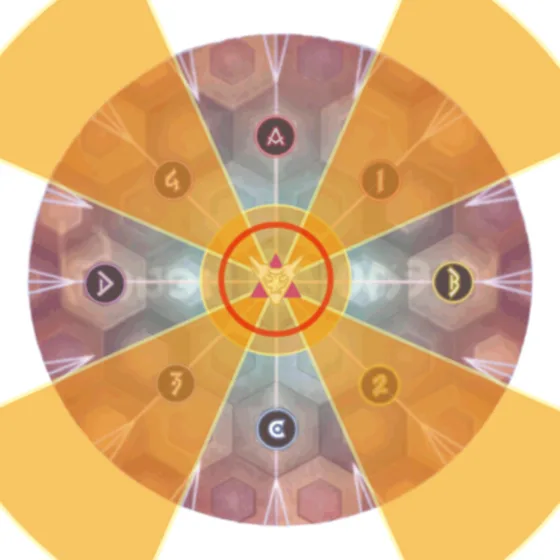
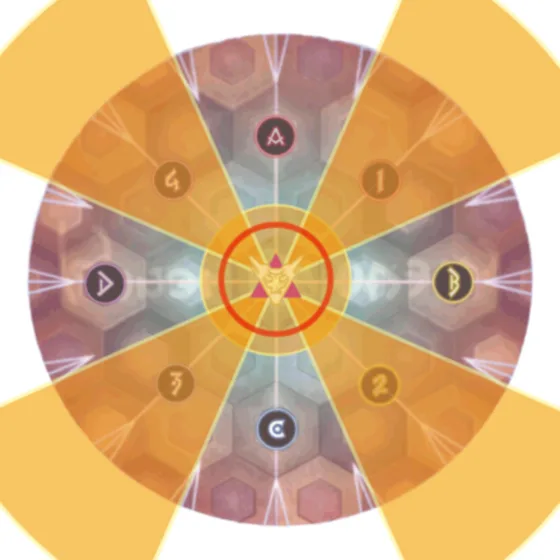
These combos return in every Live phase. Each one is cones with an in/out attack, then a cross, then the opposite in/out. Treat it as a route, not one spot.
03Honey B. Live: 1st BeatTowers to set hearts, then share the heart stack.
Check your heart count first. In the JP PF Strat tanks and melee aim for two hearts, ranged and healers for three. Each tower adds one; melee take inner towers, ranged the outer ones.
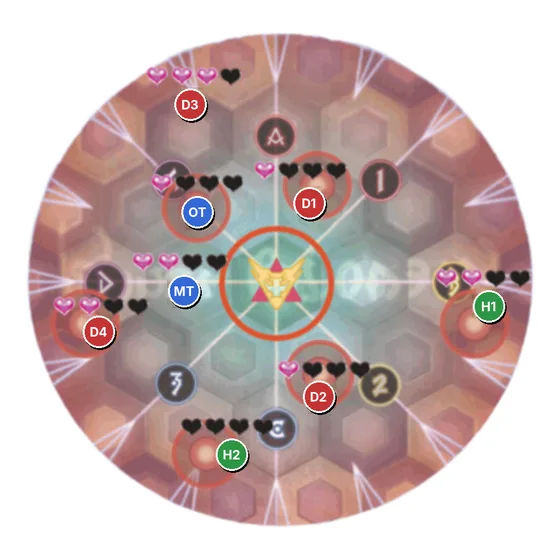
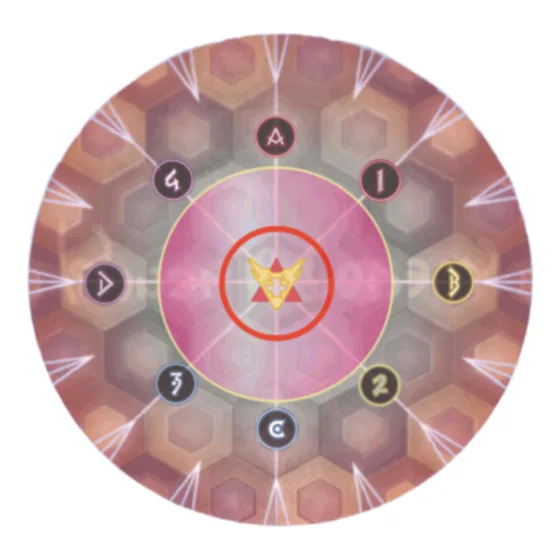
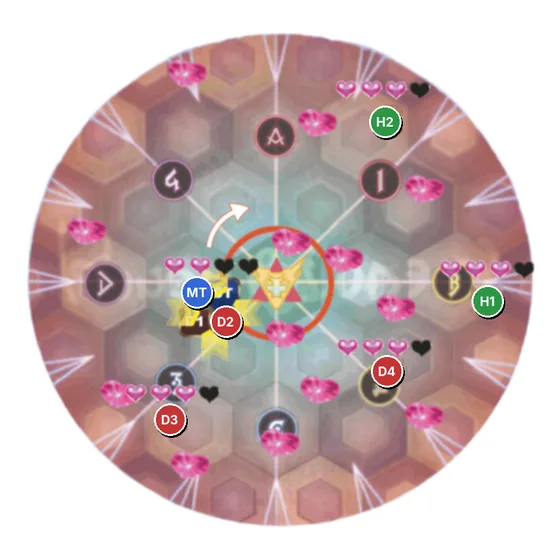
The stack goes to the player with the fewest hearts. Usually the four players on two hearts share it and end on three; players already on three stay out. Finish the opposite stage combo, then mitigate Honey B. Finale.
04Alarm Pheromones 1Bees charge in lines. Bait together, then follow the safe lanes.
Bees spawn around the arena and charge in straight lines at players. Finish the tankbuster first, then bait as a group so the first lines are predictable.
- JP: watch the first lines and move into lanes that have just resolved; Sprint if needed.
- NA "MK N": main tank pulls the boss north, everyone stacks north for the first lines, then rotates together around the edge.
- Split route: melee north, ranged south, then rotate. Only if the party agrees.
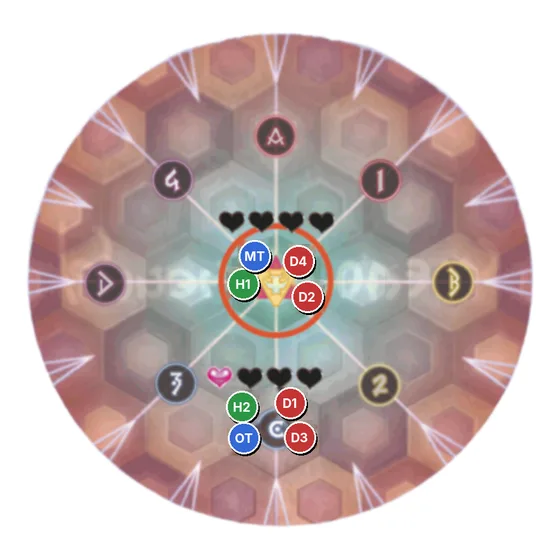
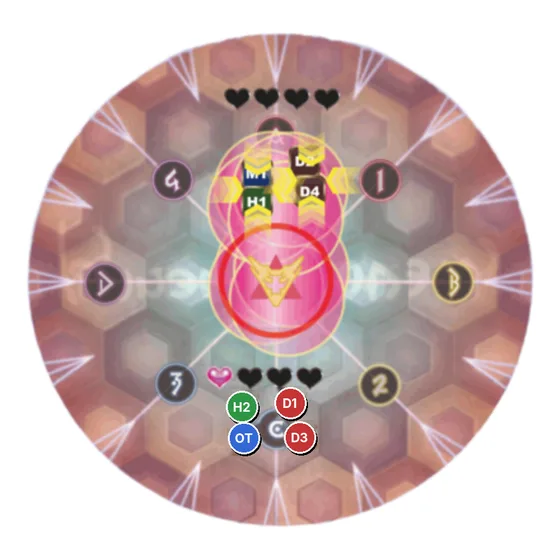
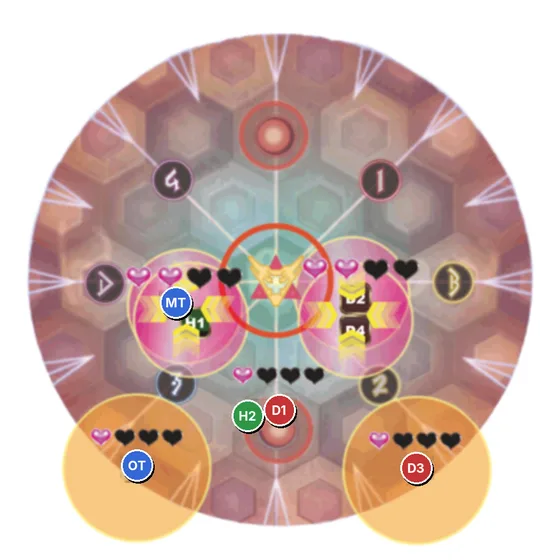
05Honey B. Live: 2nd BeatZero-heart players bait and stack; one-heart players take circles and towers.
Four players start on zero hearts and four on one. Zero-heart players handle the puddle baits and stack markers; one-heart players take the targeted circles or towers. Remember the Love cast.
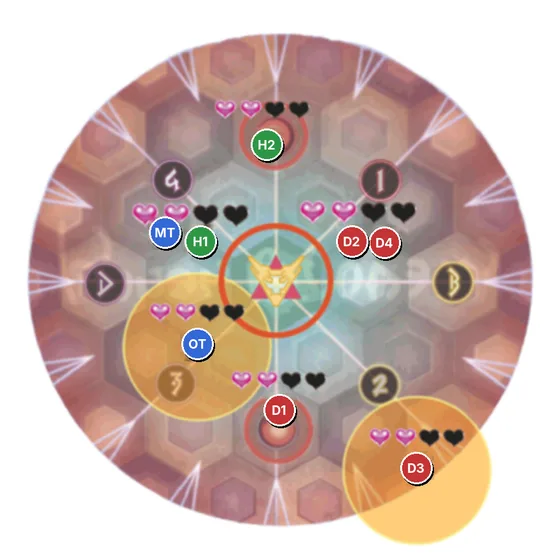
06Alarm Pheromones 2Four Poison Sting puddle drops at the edge, then role stacks.
Remember the new Venom cast. Bee lines leave a safe square in the middle and pockets at the edge. Each Poison Sting marks one support and one DPS: drop the puddle in an outer pocket and keep the center clean.
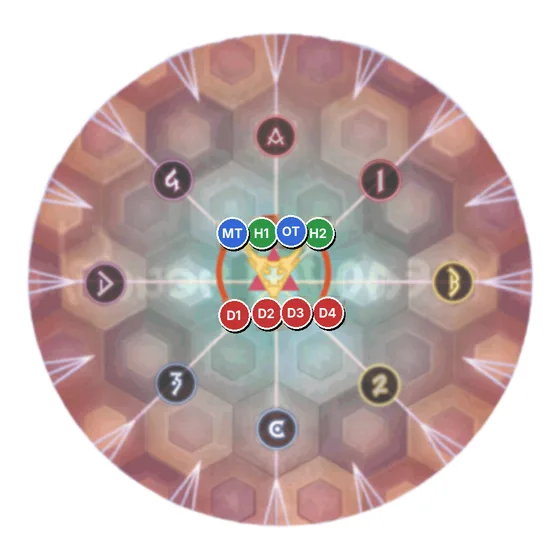
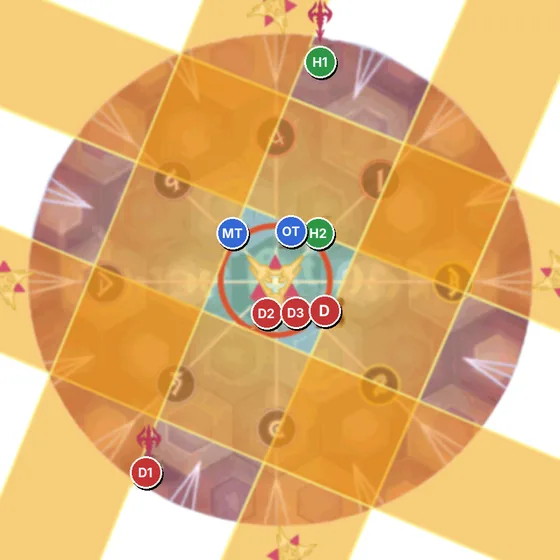
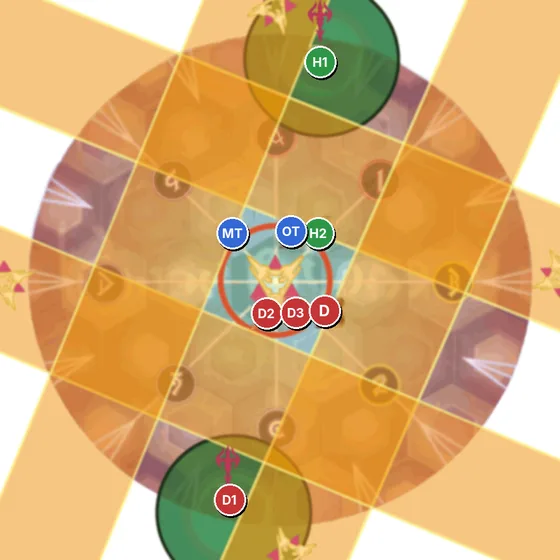
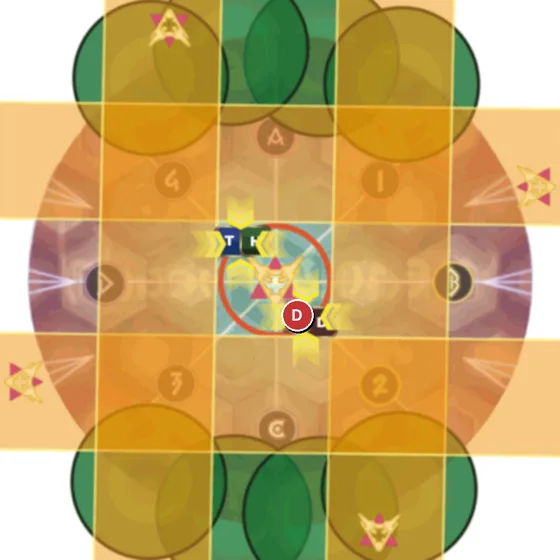
07Honey B. Live: 3rd BeatShort timers explode out, long timers take towers, then swap.
One role gets short Poison 'n' Pop timers, the other long ones. Finish each stage combo before the big explosions and towers.
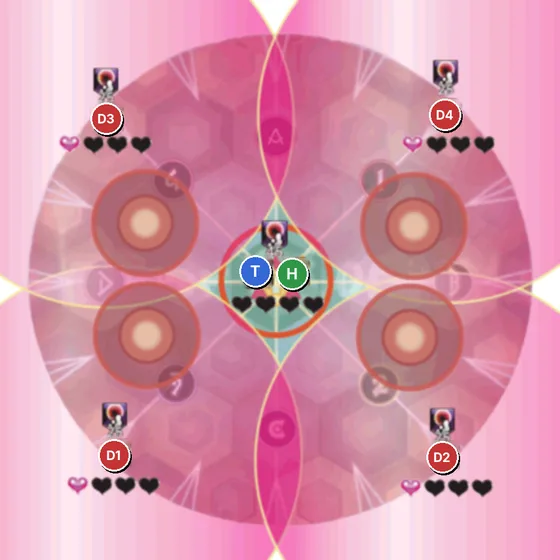
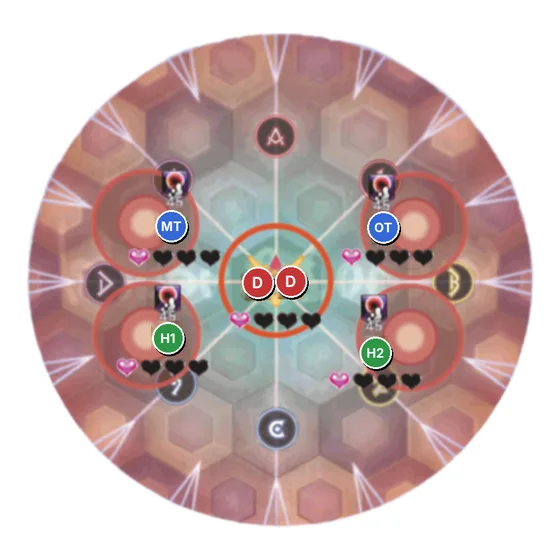
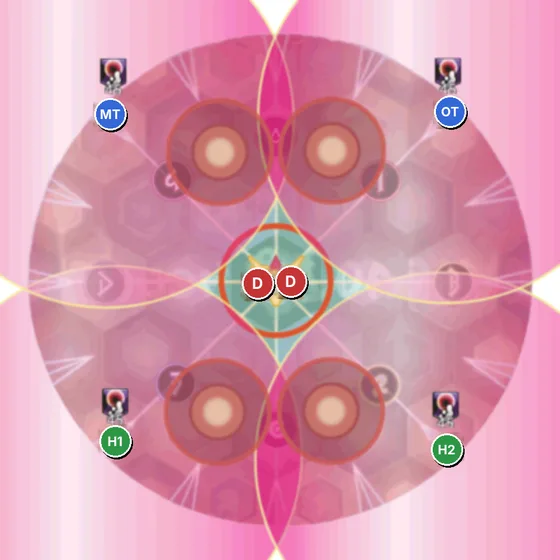
08Rotten HeartOpposite pairs touch at about six seconds, one pair at a time.
Start spread on clock spots. Everyone gets Beeloved Venom α or β with a timer. Matching opposite pairs touch to cleanse; each contact deals party damage and a short magic vulnerability.
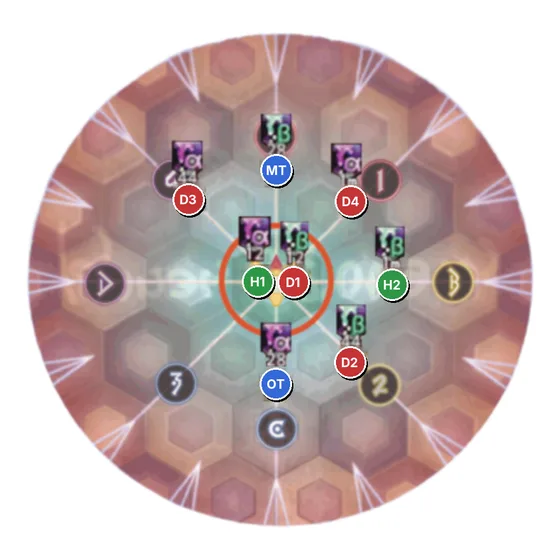
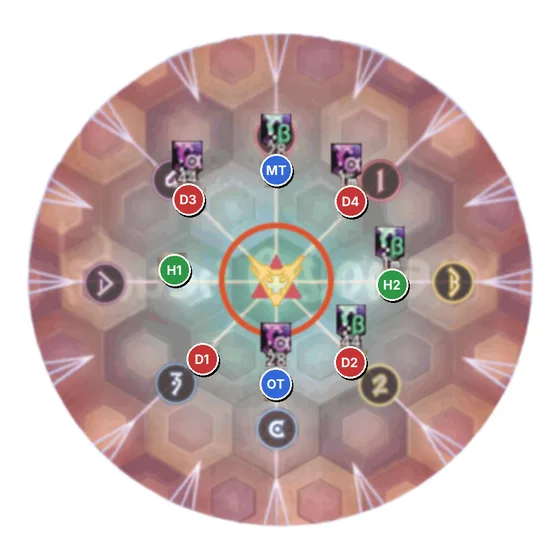
09Sheer Heart AttackHard enrage at roughly ten minutes.
Keep damage up through the last raidwides. Earlier charms raise both the damage check and the healing load.
JP vs NA vs EU
| Mechanic | JP (this guide) | NA (0S/1N) | EU (Hector-based) |
|---|---|---|---|
| Beat 1 hearts | Tanks/melee aim for 2, ranged/healers for 3. | Actual heart count decides who joins the stack. | Same principle; confirm the plan. |
| Alarm Pheromones 1 | Reactive dodge, or a route if agreed. | North group bait, then rotate (MK N). | Split-group routes also exist; confirm direction. |
| Beat 2 | Zero hearts center then north; supports west, DPS east stacks. | Zero hearts south, one heart north, rotate clockwise; stacks merge. | Split or merged stacks: confirm. |
| Alarm Pheromones 2 | Supports north/west, DPS south/east. | Same priority. | Some guides say west/east. |
| Beat 3 | Quadrant defamations, assigned towers. | Clock defamations, color towers. | Confirm clock or quadrant. |
| Rotten Heart | Opposite pairs touch at about 6 seconds. | "Rot 6s": same idea. | Same idea. |
These are common strat families, not a census. Individual parties can differ.
Loot and rewards
 Dark Horse Champion's Head Gear Coffer (IL 730)Coffer
 Dark Horse Champion's Hand Gear Coffer (IL 730)Coffer
 Dark Horse Champion's Foot Gear Coffer (IL 730)Coffer
 Universal TomestoneCoffer
 Surgelight GlazeCoffer
 AAC Illustrated: LHW Edition IIx1 · guaranteed · exchange for gear
 Allagan Tomestone of Mnemonicsx15
Sources
Feature details are checked against official documentation. Checklists and practice suggestions are written by Vtomes.
- Square Enix (Lodestone) — Patch 7.05 notes
- Console Games Wiki — AAC Light-heavyweight M2 (Savage)
- Game8 — Arcadion Savage guides (JP strat and diagrams)
- Square Enix — FINAL FANTASY XIV item icons
Image sources: Vtomes · FINAL FANTASY XIV © 2010 - 2026 SQUARE ENIX CO., LTD. All Rights Reserved.